

This tutorial is a guide for developers who want to use Tizen IoT on Raspberry Pi3 or Raspberry Pi4
If you want an Korean version, please use following tutorial. https://samsung.github.io/TizenSchool/tutorial/194
It shows the easiest way to set up your development environment. This course consists of the following 4 steps.
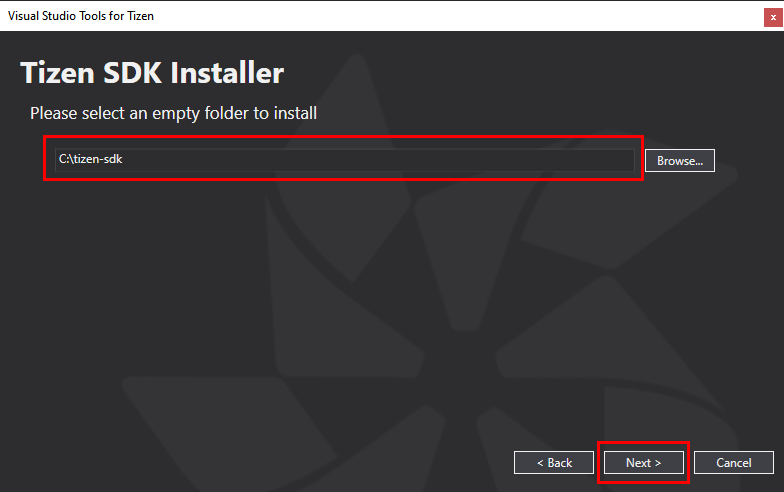
Installing Visual Studio and Tizen Studio
Flashing the SD card using IoT Setup Manager
After setting up Wifi, Connecting PC and RPI
4. Creating and Deploying a project
Development environment
Pre-order


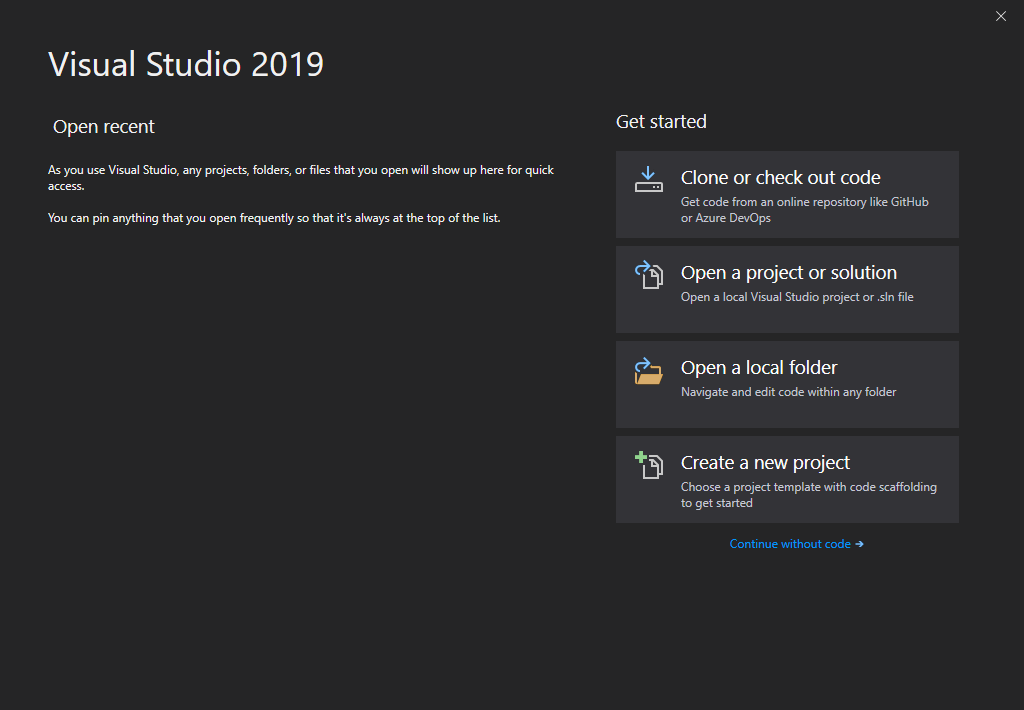
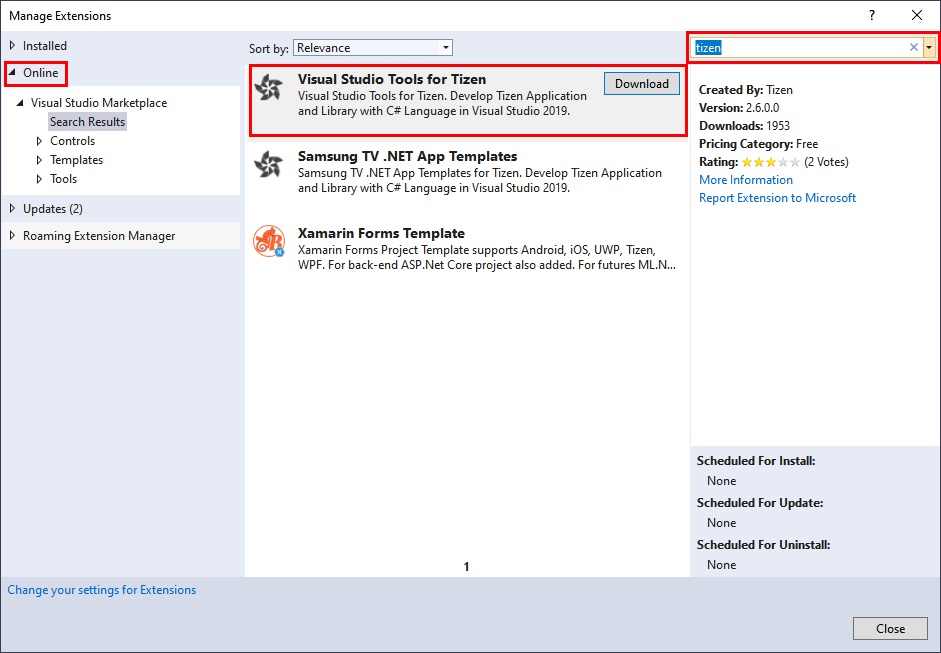
Visual Studio Tools for Tizen extension is registered in Visual Studio Marketplace.
You can install extensions from the Visual Studio Marketplace in Visual Studio IDE.

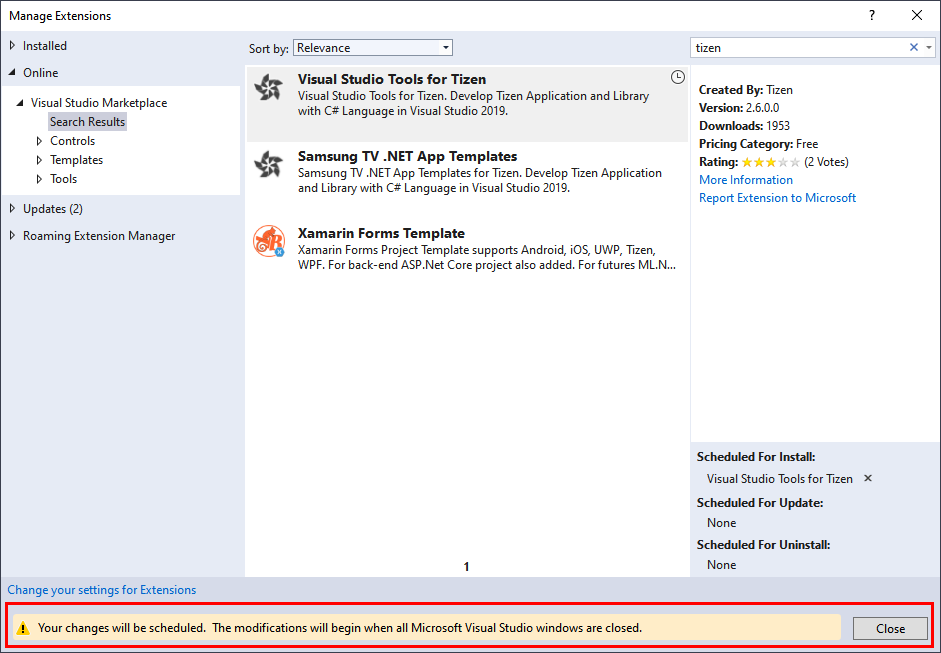
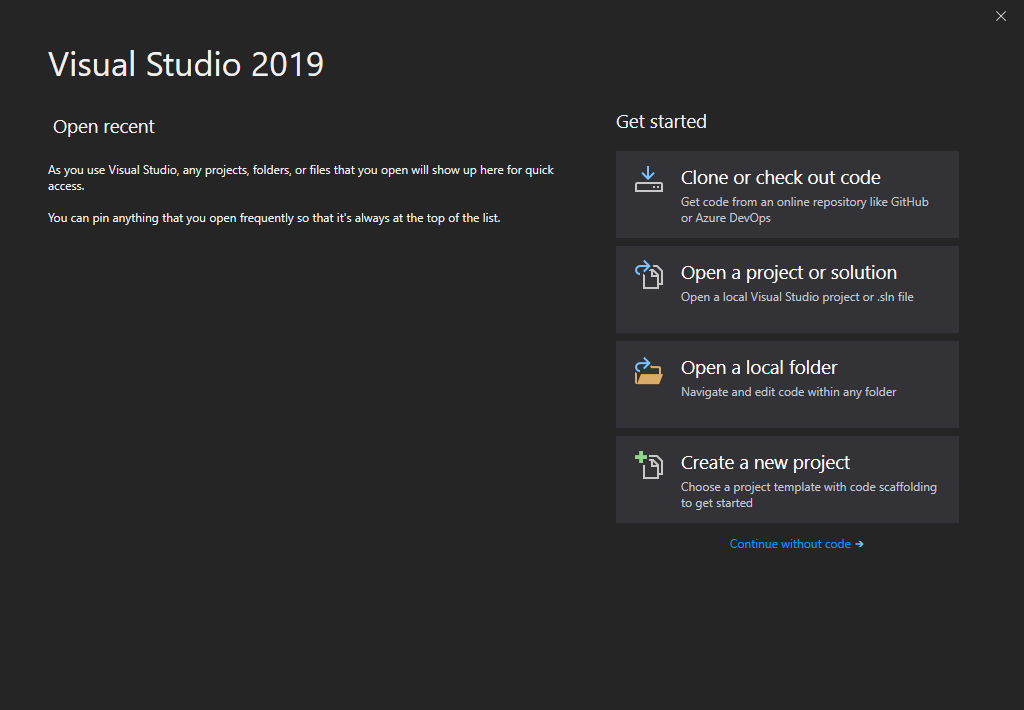
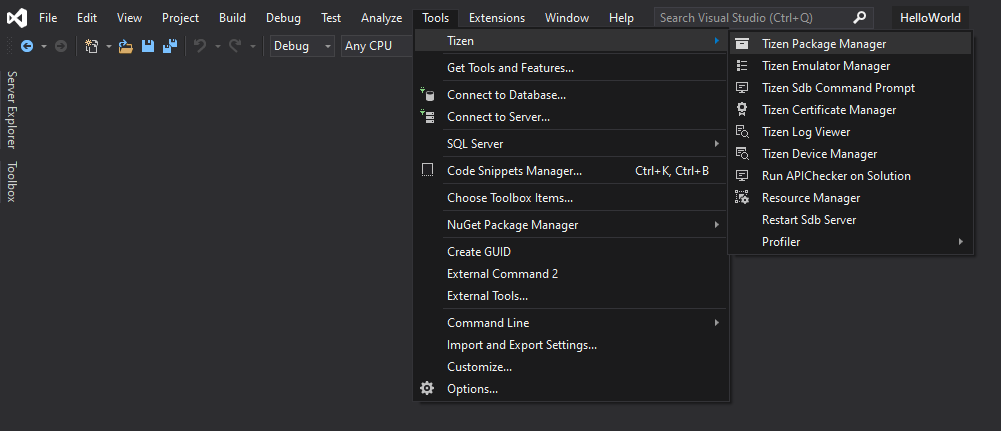
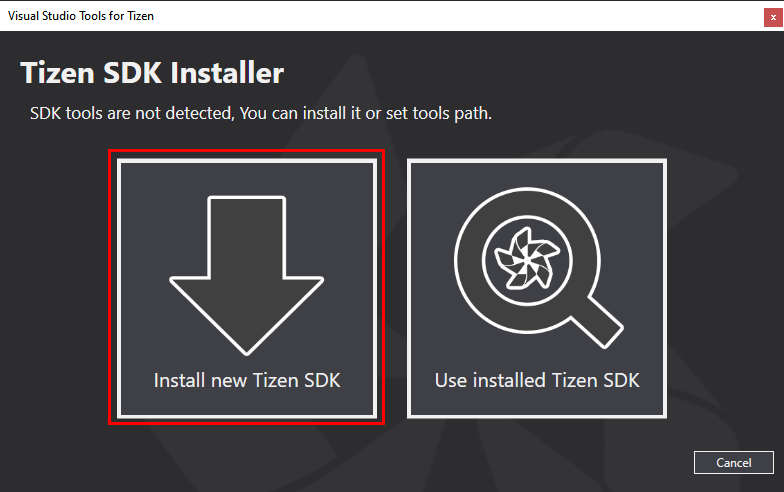
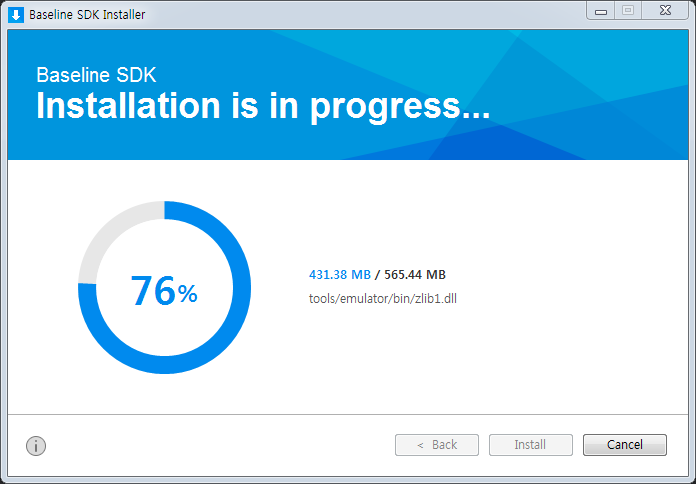
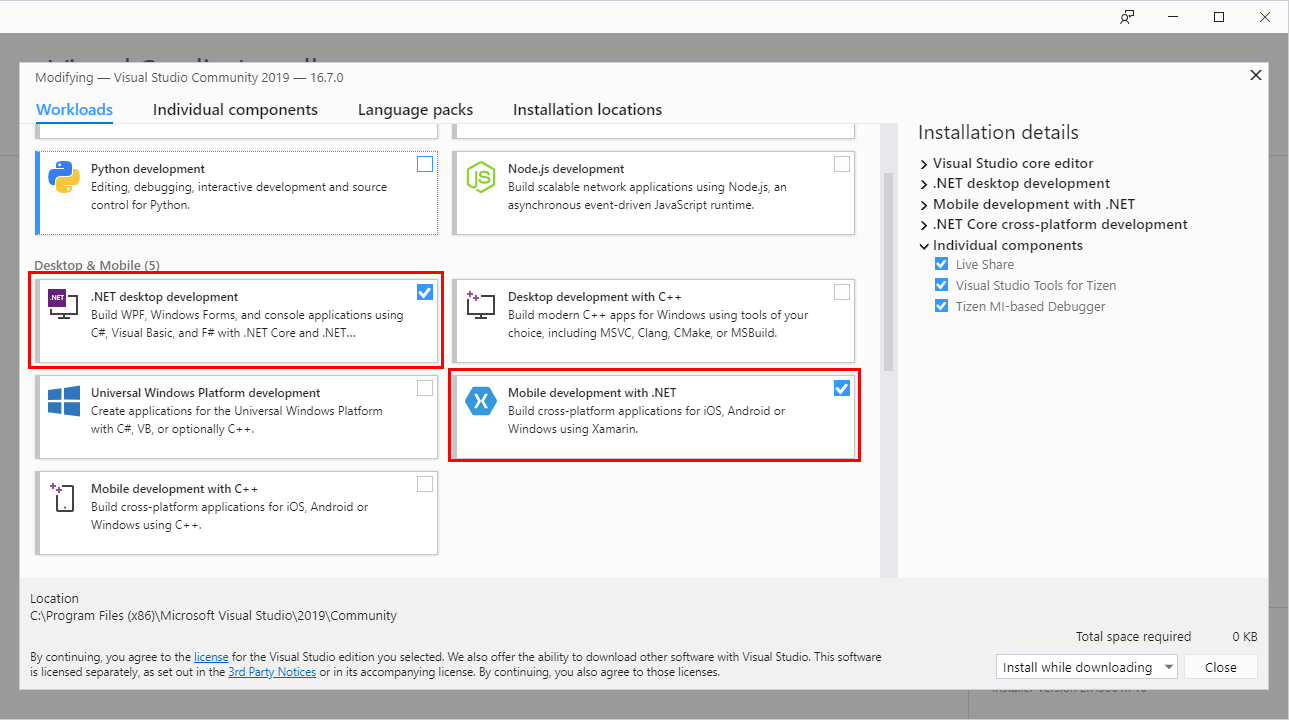
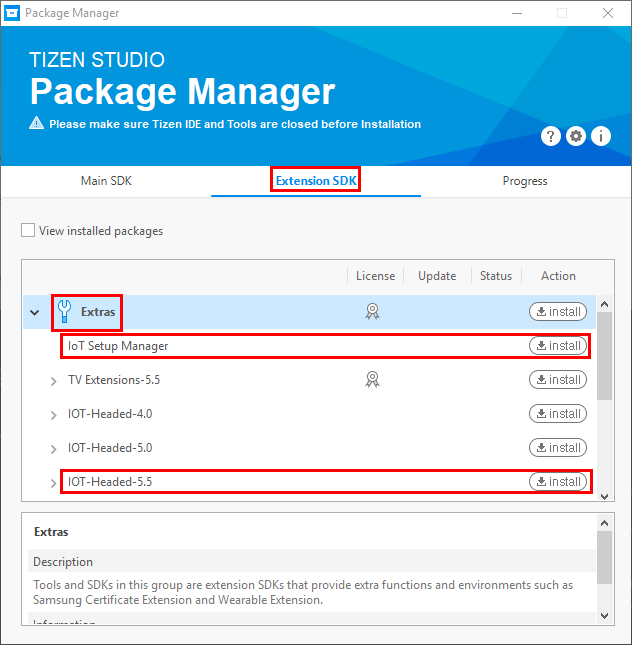
Select the Extension SDK tab and Extras . Extras includes IoT Setup Manager and IoT-Headed-5.5 profiles.
(If you want to use IoT-Headless, please select it.)
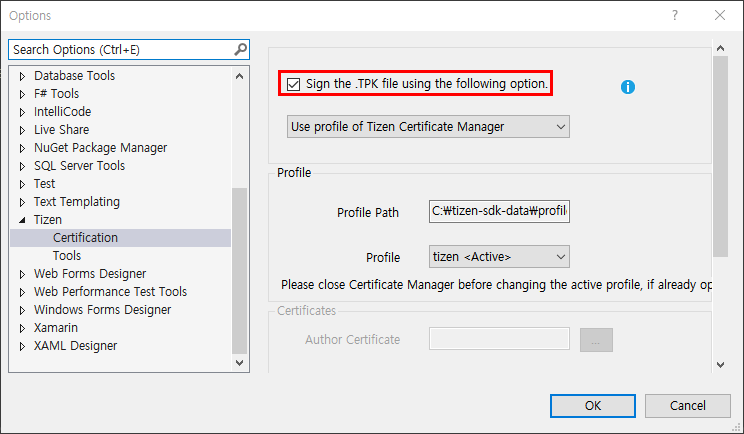
You should create a Tizen Certificate before you install your application.
If you do not havea certification, the following error is displayed..

2. Go to Tools > Tizen > Tizen Certificate Manager

3. If a “Migration for Certificate Profile” dialogue box opens, click “OK” to continue


For flashing Tizen image, download the image and Raspberry plugin files.
1. Download Tizen Image Files
Boot Image : download the appropriate image for your board
Platform Image: download the appropriate image according to the usage of display
2. Download Raspberry Plugin
A plugin should be installed in order to use the Wifi module.
Download the plugin file from the Raspberry Pi 3/4(5.5/6.0) Plugin section in http://developer.samsung.com/tizendevice/firmware
(The plugin is compatible with both RPI3 and RPI4.)

After extracting the file, copy wlandrv-plugin-tizen-1.0.6-1.armv7l.rpm in the connectivity directory to a new empty directory.

1. Insert a Micro SD card into a reader and connect it to the computer
[Troubleshooting]
When you connect an SD card that already has a Tizen image installed, the disk format popup window may appear. In such cases, close all pop-up windows without selecting any options.
2. Run IoT Setup Manager
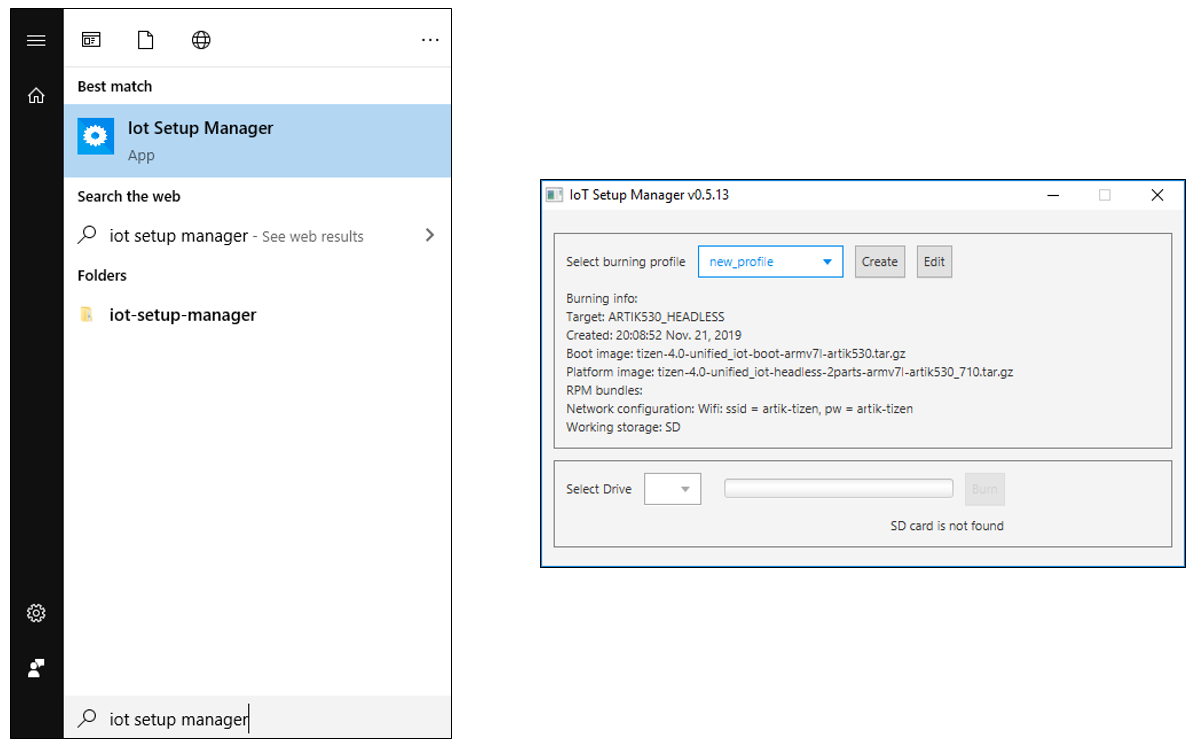
Search for ‘IoT Setup Manager’ from the Windows search bar and open it.
(Or you can run ‘IoT Setup Manager’ from the IoT menu at the top of the Tizen Studio.
Then, click ‘Create’ button to create a new profile.
[Troubleshooting]
If you can not launch “IoT Setup Manager”, install JDK by referring to the “Appendix (Installing JDK)”[Link].
3. Set up an IoT Profile
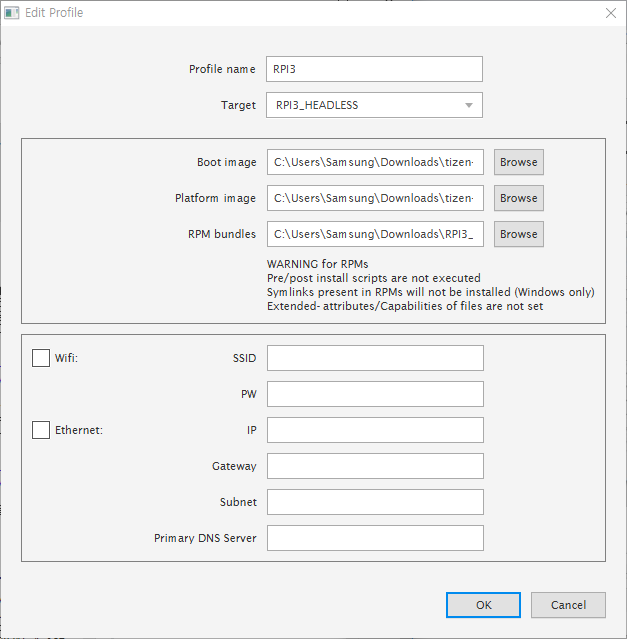
Enter some information about the profile and add image files.
4. Create and Flash image
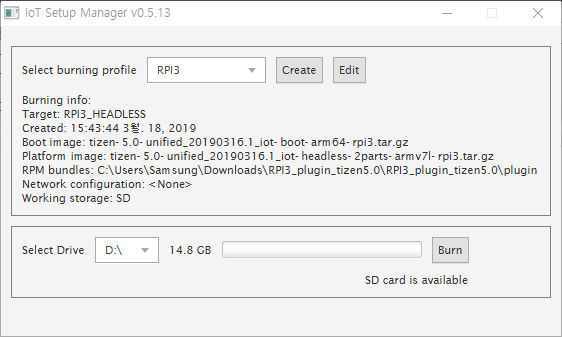
Select the profile that you just created in the IoT Setup Manager window.
In the Select Drive section, select the drive of the Micro SD card recognized by the computer, and press the ‘Burn’ button.
When the progress bar fills up, and the message ‘Done’ appears at the bottom, TIZEN image flashing is complete.
[Troubleshooting]
If you can not complete to burn, please burn it without the RPM bundles.
And install the RPM bundles by referring to the Appendix(Installing WiFi Plugin)[Link].
5. Insert Raspberry PI image
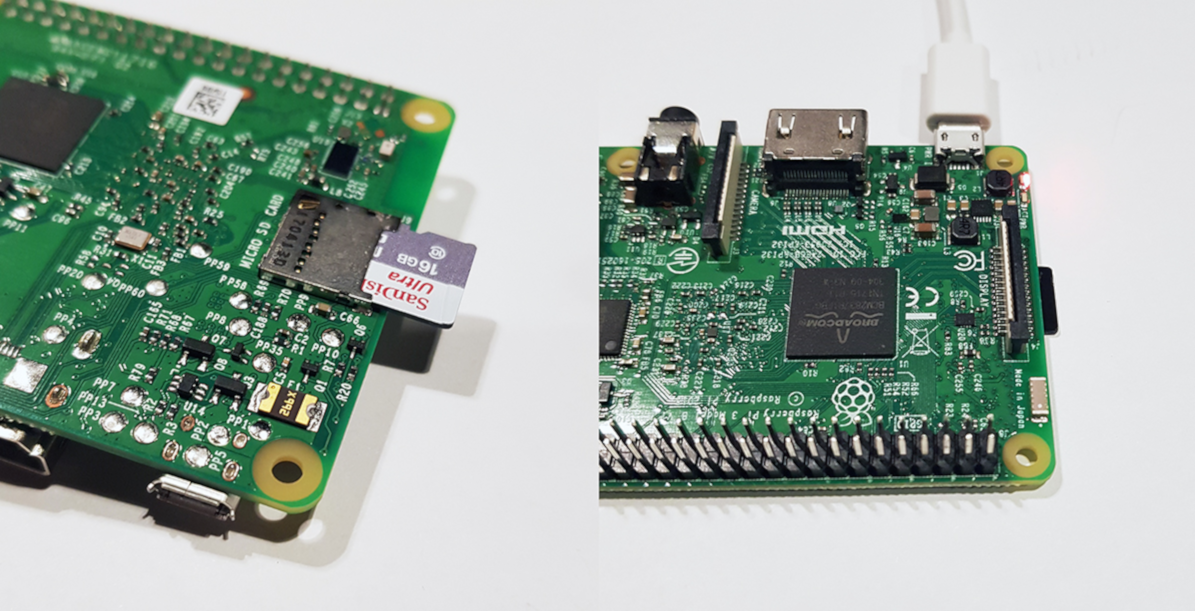
Remove the SD card from the reader, insert it into the Micro SD card slot on the back of the Raspberry Pi, and turn on the Raspberry Pi3 to boot.
For installing your application on the Raspberry Pi board, you should connect your board to a PC.
In order to do so, you need to find out the IP address of your board.
There can be two ways according to your situation. Let’s find out!
1) Using the Settings App (Easy way)
: If you are using the headed image and a monitor , you can find out your IP address easily.
You can use the settings app after booting.
Please refer to the page IV-2-1[Link].
2) Using Serial Communication
: If you are using the headless image or do not have a monitor, you should use serial communication.
Please refer to the page IV-2-2[Link].
This is a guide for the case when you are using the headed image and a monitor.
Otherwise, refer to the next page to use serial communication.
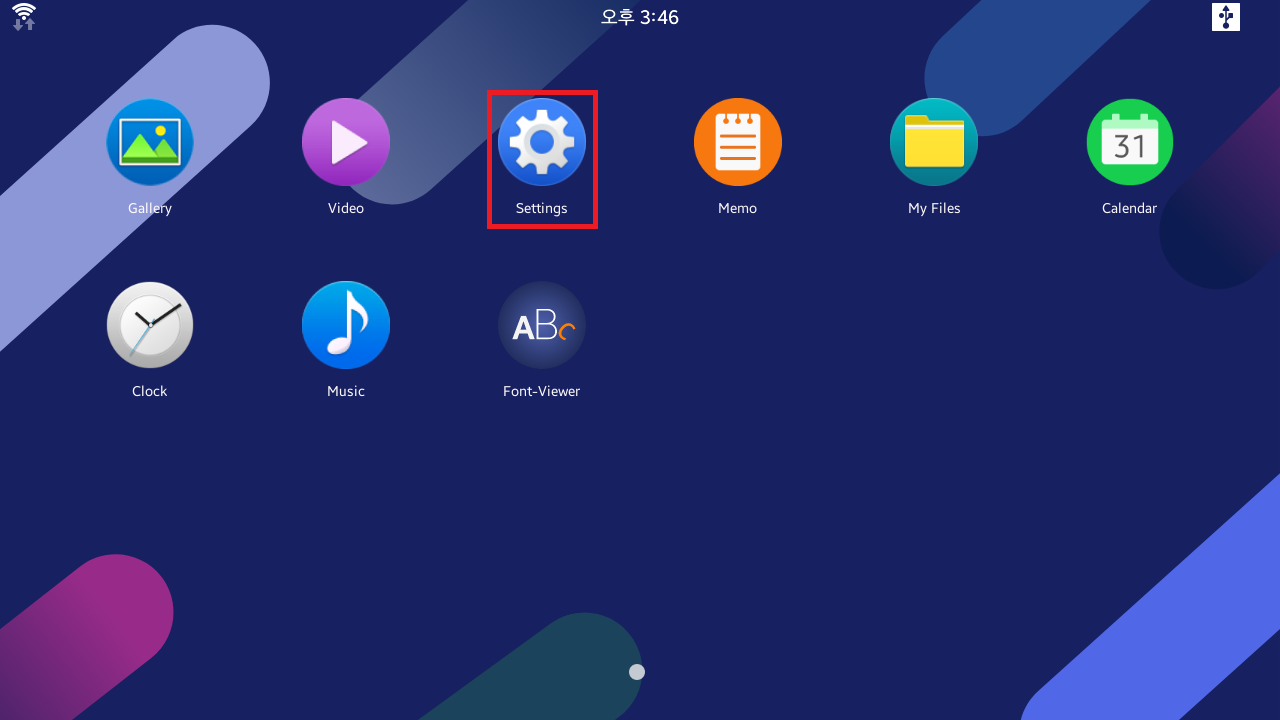
1. Open “Settings”
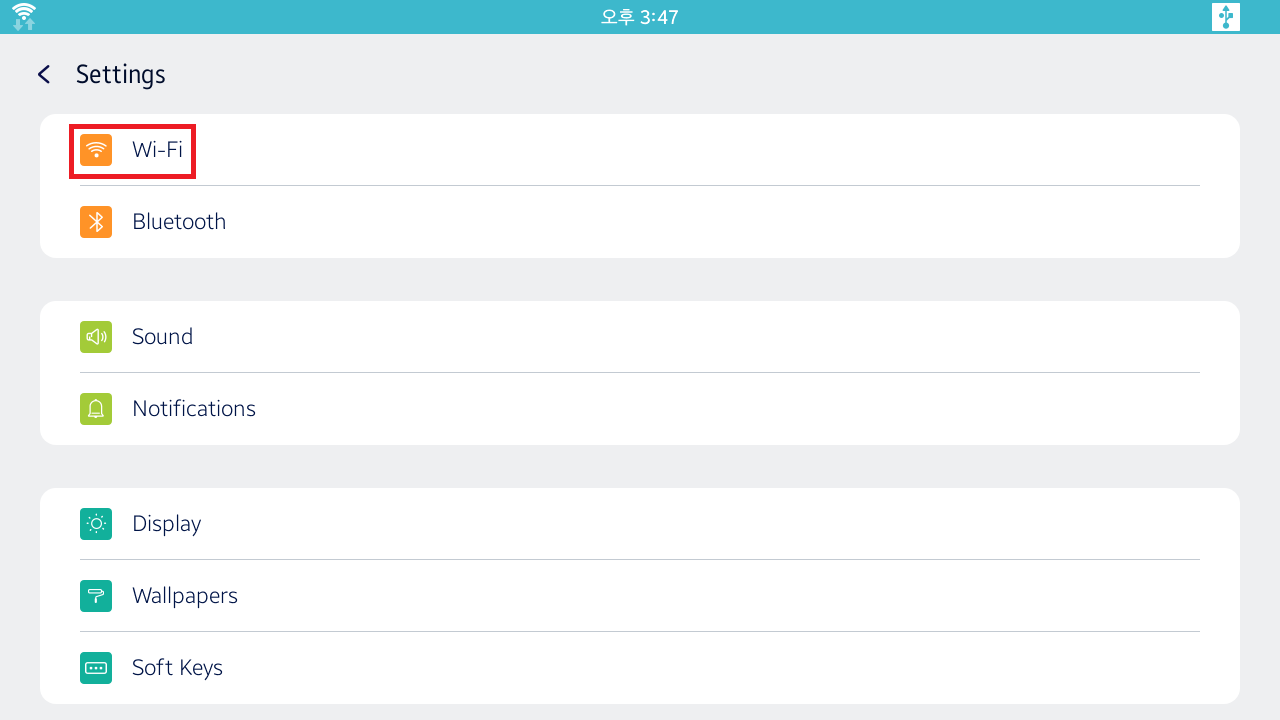
2. Move to “Wi-Fi” page
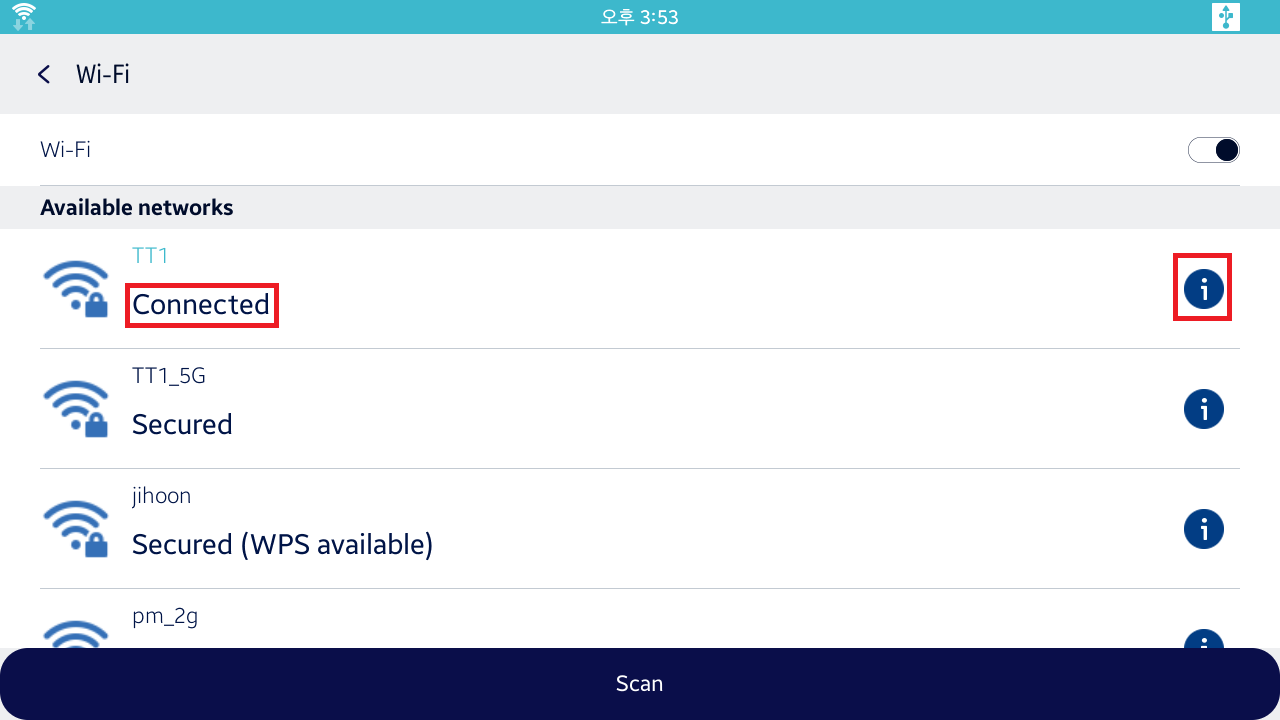
3. Find the AP that the device is connected to. Then, click the information icon.
: If there is no existing connection, connect to a new AP after scanning.

4. Find the IP address
: You will use the IP address of Raspberry Pi when connecting to the PC.
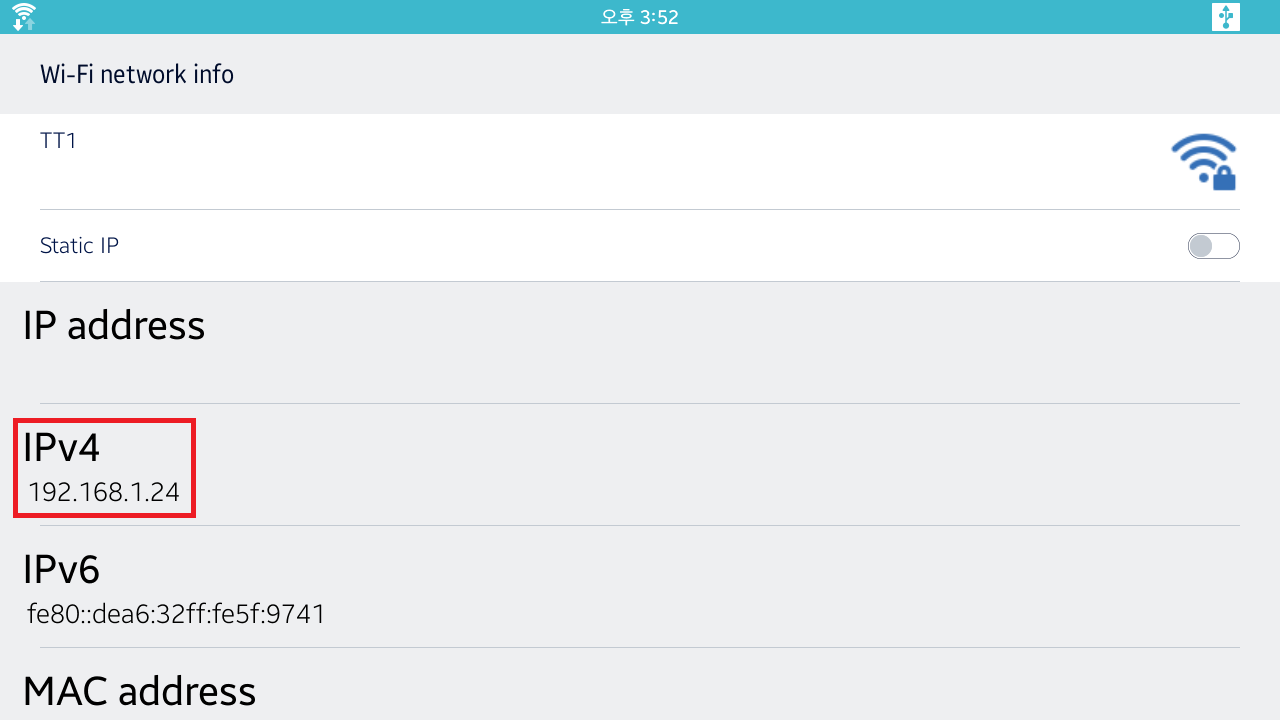
If you cannot find the IP address using the Settings application, refer to the next page to use serial communication.
This is a guide for the case when you are using the headless image or when you do not have a monitor.
This guide uses PL2303 serial port for the serial communication. You can use other products if you want.
In order to connect Raspberry Pi to the serial port, you need to understand the serial communication.
Refer to the links for more information about serial communication. SERIAL COMMUNICATION
1. Install the serial port (PL2303) driver
Install the driver of the serial port that interconnects the Raspberry Pi and the PC.
Since this guide is using PL2303 serial port, download and install the PL2303 driver. [Link]
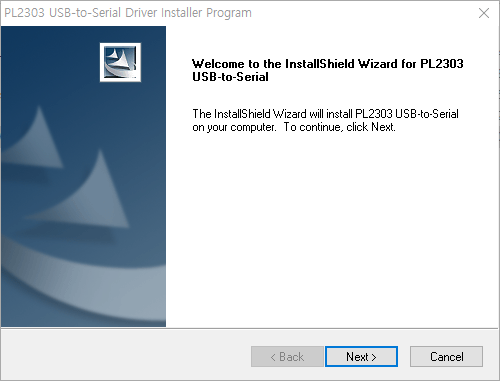
2. Install the serial terminal (PuTTY)
Install the serial terminal for communicating with the board through the connected serial port to the PC.
Download and install the PuTTY program. [Link]
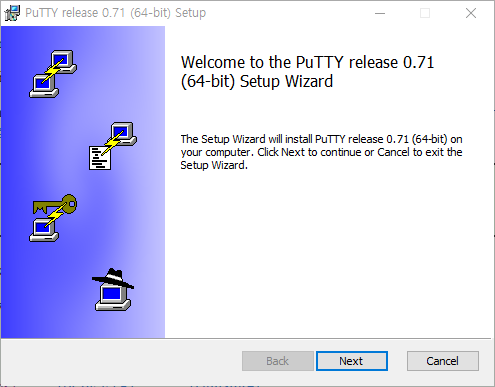
3. Connect Raspberry Pi to Serial Port (PL2303)
As shown in the picture below, Raspberry Pi and PL2303 serial ports have these two pins. RX, TX are the role names they are responsible for. One is for transmission (TX-Transmitter) and the other is for reception (RX-Receiver). Therefore, when connecting two devices, they should be connected as TX-RX and RX-TX as shown below. GND shoud be connected to GND pin of Raspberry Pi.
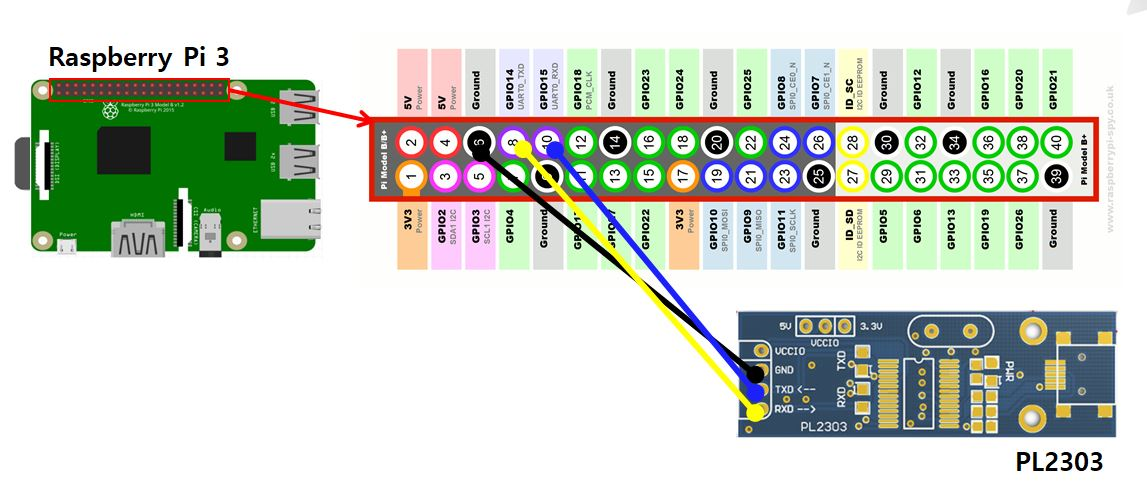
When the pin connection is finished, plug the serial port into the USB port of the PC.
4. Set up the serial terminal (PuTTY)
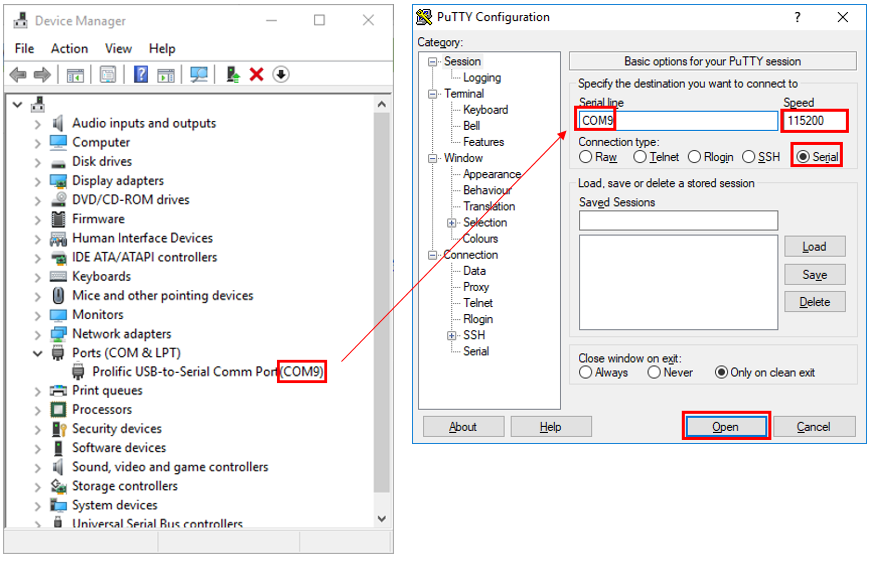
Open the [Device Manager] to find the port number of the USB Serial Port as shown in the figure above.
If the serial port is not recognized, check again that the serial port driver is properly installed.
Enter the serial number in PuTTY Configuration and click [Open] to open the serial terminal.
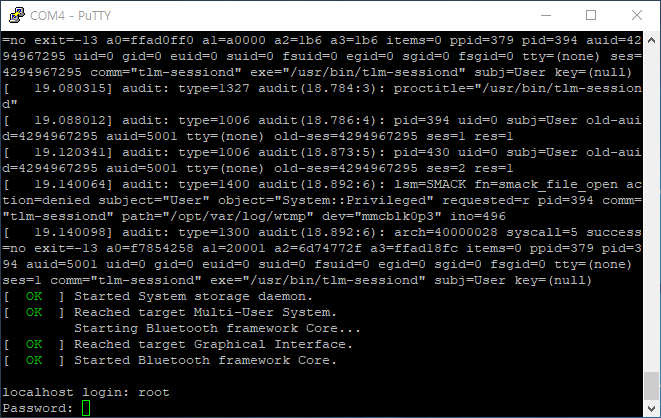
5. Raspberry Pi Log in

When the Raspberry Pi booting is completed, the login prompt gets displayed.
Log in using the following ID and password. ( User ID: root / Password: tizen )
6. Connecting to WiFi with wifi_manager_test
$ wifi_manager_testWhen you enter ’ wifi_manager_test ’ command from the serial terminal, the following screen will appear where you can set the WiFi environment.
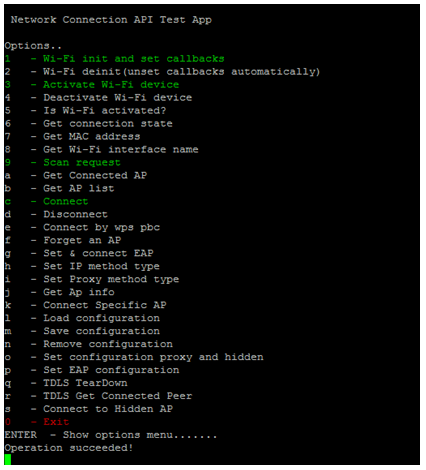
Type “1> 3> c” to connect WiFi. Then enter your AP name and password.
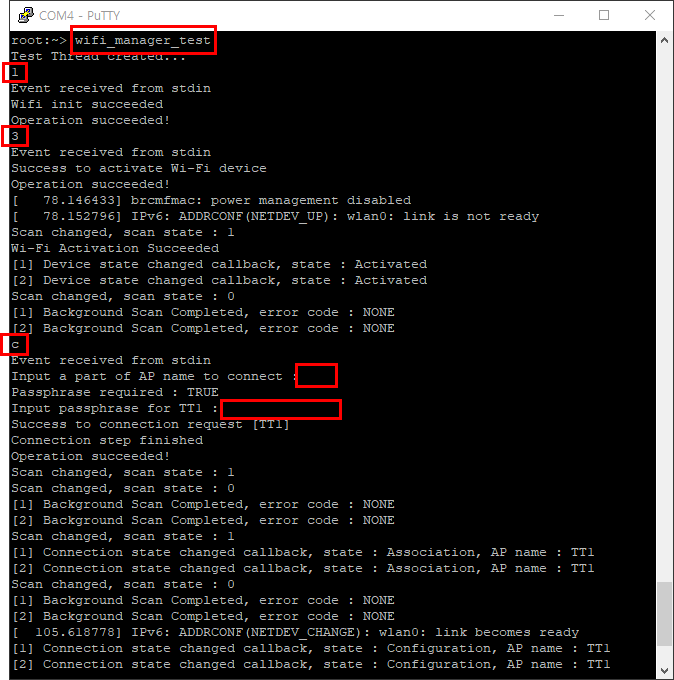
Enter “0” to end the WiFi connection setup.
7. Check the IP address of the connected WiFi
$ ifconfig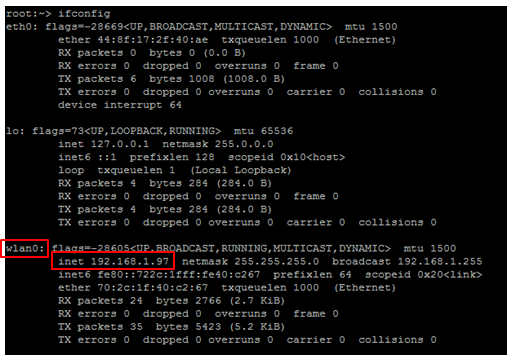
You will use the IP address of Raspberry Pi when connecting to the PC.
PC and Raspberry Pi can be interconnected using Device Manager.
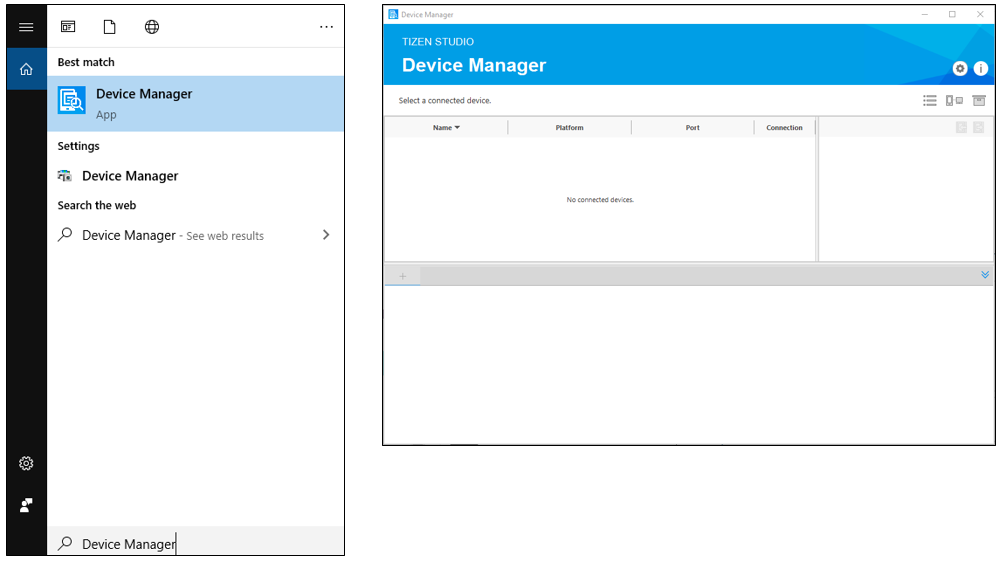
1. Run Device Manager
: Search for ‘Device Manager’ from the Windows search bar and open it.
(Or you can run ‘Device Manager’ from the Tools > Tizen menu at the top of the Visual Studio or Tizen Studio.)
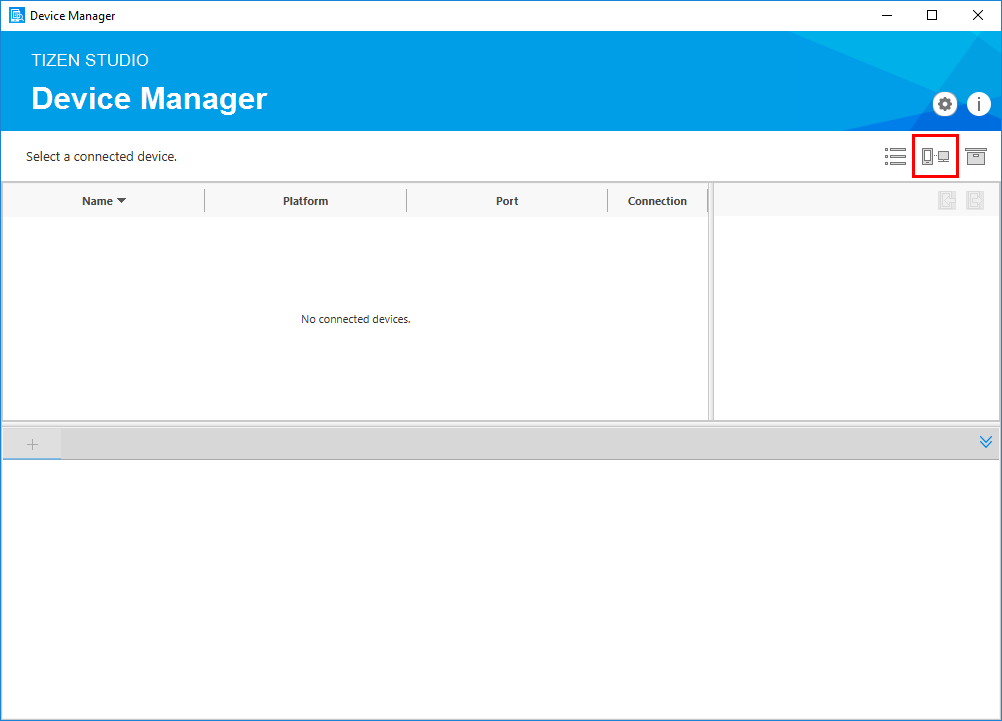
2. In the Device Manager window that appears, click ’ Remote Device Manager’ button
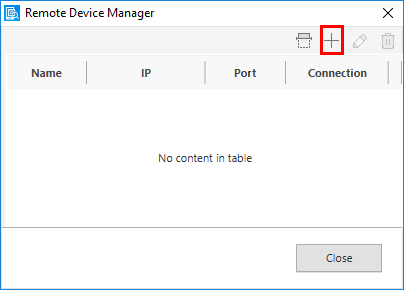
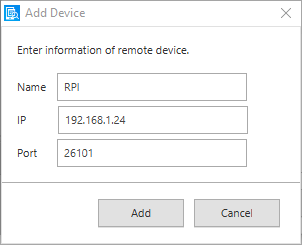
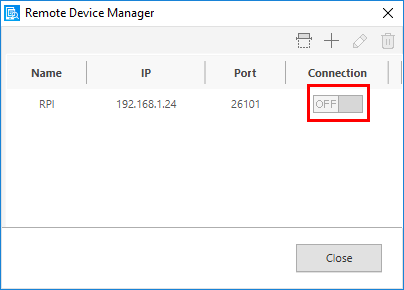
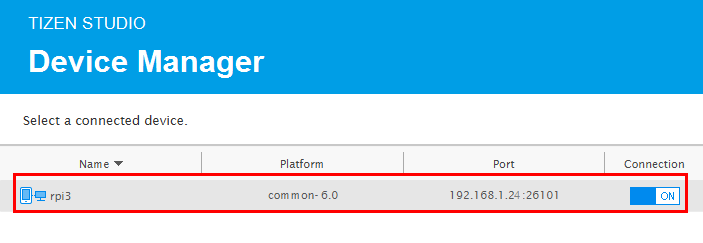

Now, you can install your applications on your RPI device.
For creating your application, you should decide on the language you will be developing with.
There can be two ways according to your situation. Let’s find out!
1. Tizen C#
If you use Tizen C#, you can easily create an application.
Especially, Xamarin.Forms UI Framework is supported for easy UI development.
So, it is recommended to use C# when you create a UI application .
You should use Visual Studio for creating a Tizen C# application.
Please refer to page V-2[Link].
2. Tizen C
If you use Tizen C, you can create an application that has a higher performance and uses less memory.
So, it is recommended to use C when you create a service application .
You should use Tizen Studio for creating a Tizen C application.
Please refer to page V-3[Link].
Let’s create a Tizen C# UI application and deploy it to your RPI board.
1. In the Visual Studio menu, select File > New > Project .

2. Select C# from languages and Tizen from platforms, select Tizen XAML App (Xamarin.Forms) template, and click a ” Next ” button.
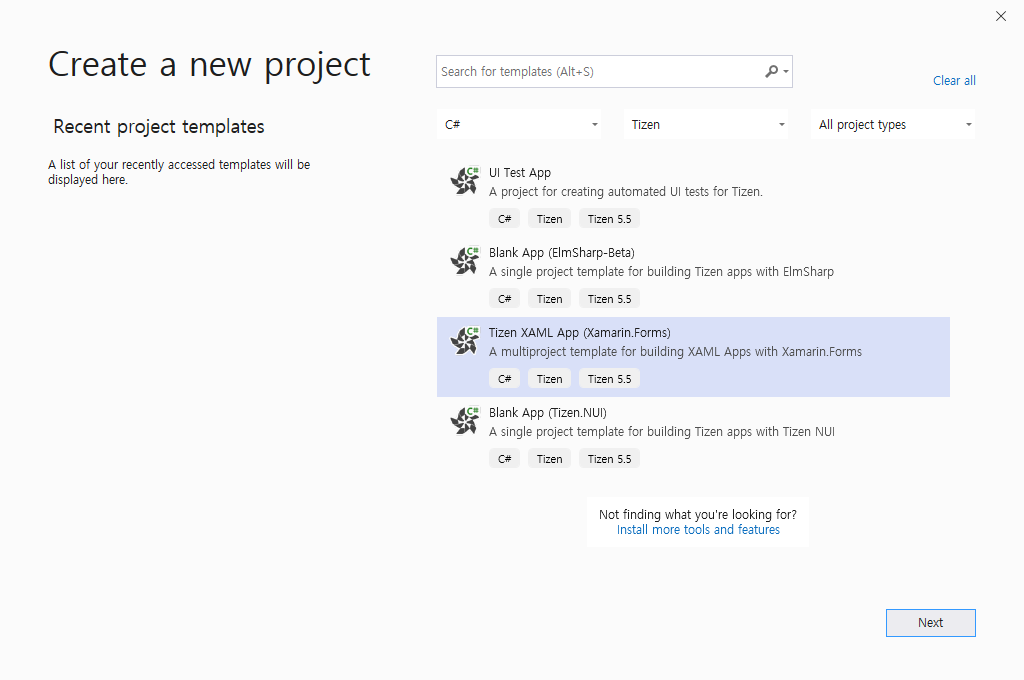
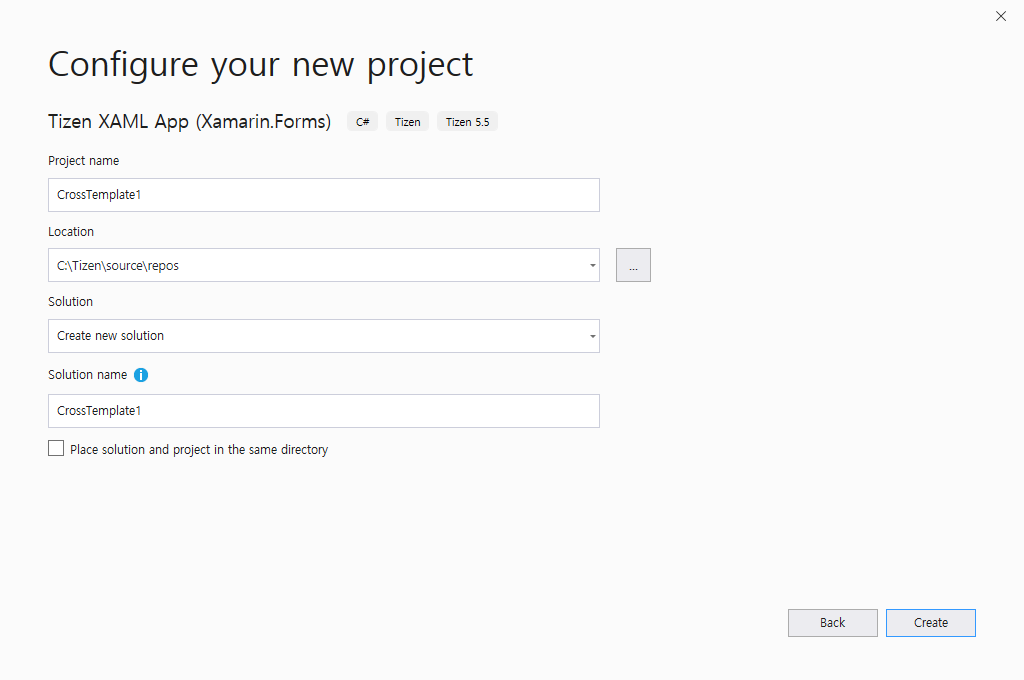
4. Select Common from profile, and click the ” OK ” button
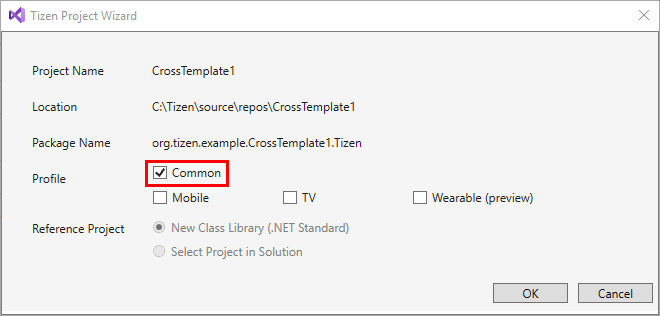
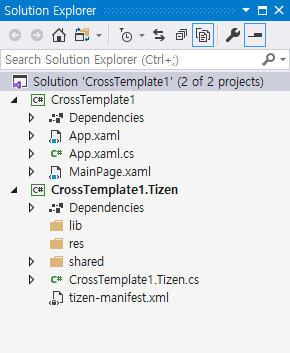

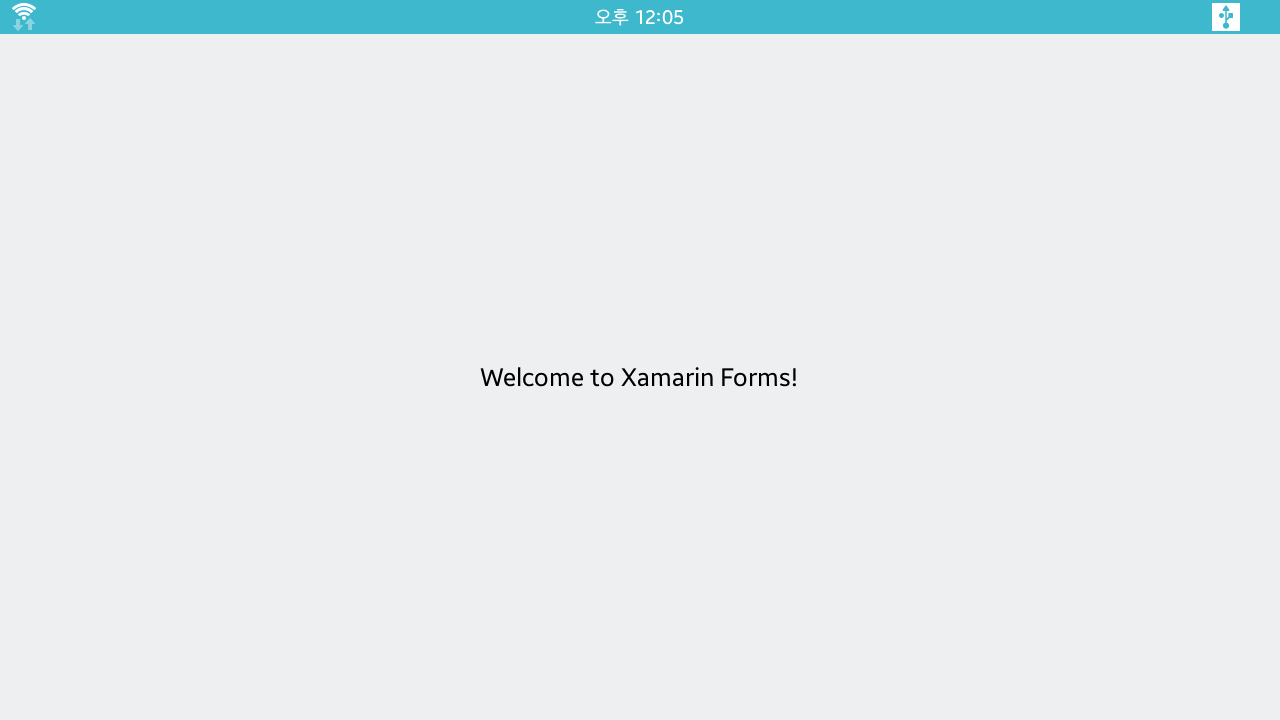
If you want to know more about the Tizen IoT C# application, please refer to the following page.
https://docs.tizen.org/application/dotnet/get-started/iot/first-app/
Let’s create a Tizen C Service application and deploy it to your RPI board.
1. In the Tizen Studio menu, select File > New > Tizen Project .


8. Insert the log code
After open the helloworld.c in the src folder and find the service_app_create function,
insert the code in the 4th line below.
[helloworld.c]
bool service_app_create(void *data)
{
    // Todo: add your code here.
    dlog_print(DLOG_INFO, LOG_TAG, "Hello World");
    return true;
}
※ LOG_TAG is defined in helloworld.h file.
9. Confirm that the RPI board is connected to your PC.


11. Check the installation result
If ” Tizen application is successfully launched. ” is displayed in the console window, the installation is successful.


If right-click on Tag and select LOG_TAG, only the log of the desired app are displayed. ex) helloworld

For using ” IoT Setup Manager ”, you should install JDK.
1. Download JDK
Download the Java SE Development Kit (JDK) installation file. [Link]
(Please use JDK 8 version instead of the latest version.)

2. Install JDK

3. Set up the JDK Environment Variables
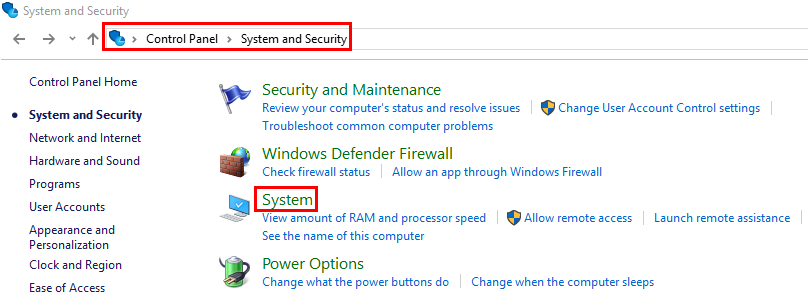
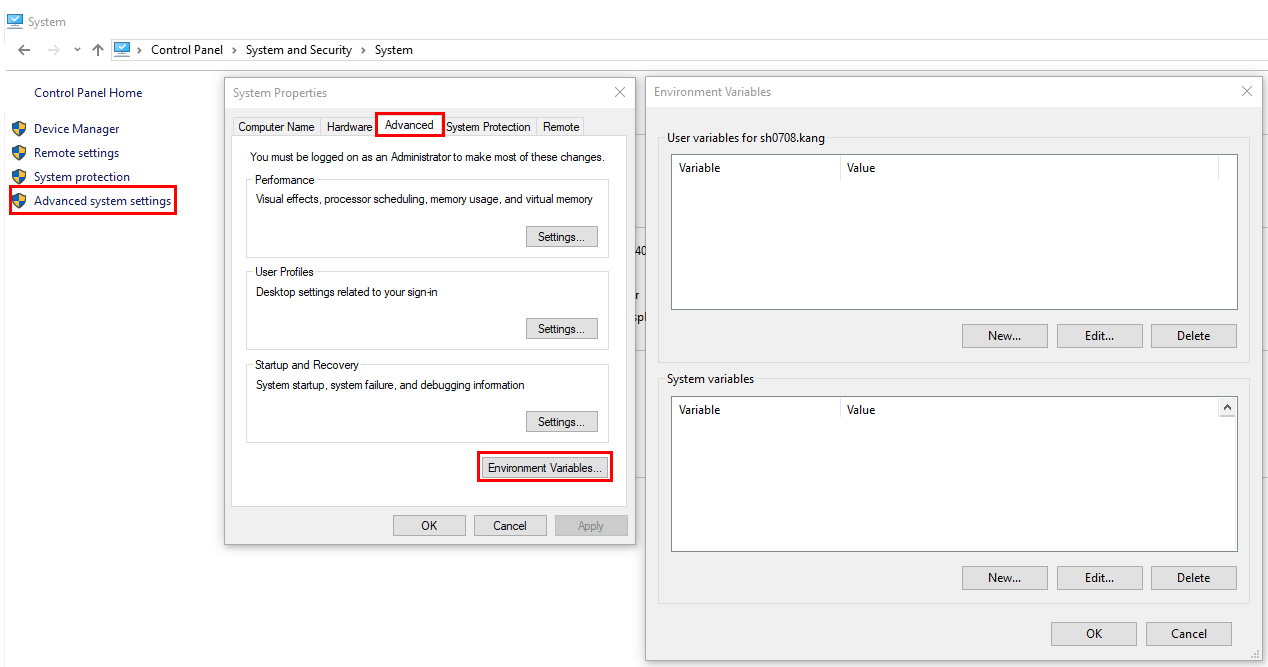
After click ” Advanced System Settings ” on left, click the ” Environment Variables ” button in the ” Advanced ” tab
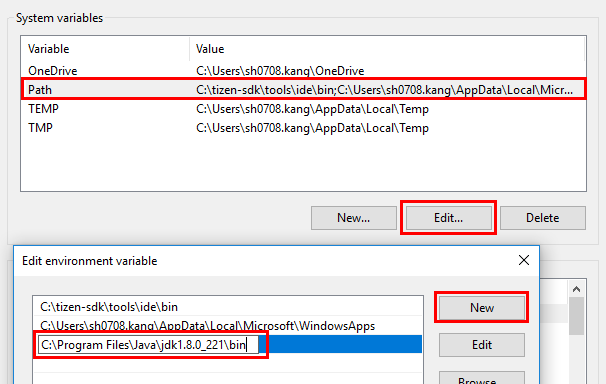
After click the ” Path ” variable from the list of system variables, click the ” Edit ” button.
After click the ” New ” button, paste the Java SE Development Kit (JDK) installation path with ” \bin ”
(ex) C:\Program Files\Java\jdk1.8.0_221\bin
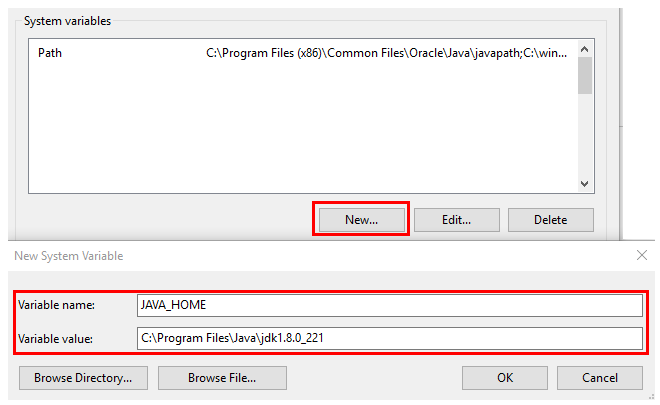
4) After click the ” New ” button in system variables , add ” JAVA_HOME ” with the Java SE Development Kit (JDK) installation path.
(ex) C:\Program Files\Java\jdk1.8.0_221
4. Check the installed JDK
Search for ’ cmd ’ from the Windows search bar and open it.
When you enter ” java –version ” on the command prompt, JDK information is displayed.


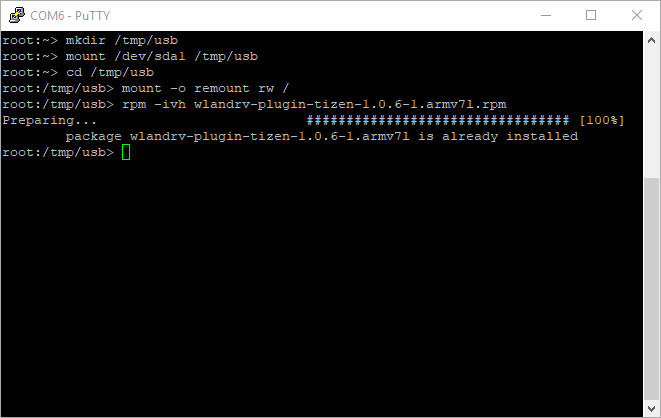
Copy the ” wlandrv-plugin-tizen-1.0.6-1.armv7l.rpm ” **** that you donwload at page III-1[Link] to a USB memory.
Log in Raspberry Pi by referring to page IV-2-2[Link].

Connect the USB memory to Raspberry Pi
Install ” wlandrv-plugin-tizen-1.0.6-1.armvmk7l.rpm ”
mkdir /tmp/usb
mount /dev/sda1 /tmp/usb
cd /tmp/usb
mount -o remount rw /
rpm -ivh wlandrv-plugin-tizen-1.0.6-1.armv7l.rpm