


With this tutorial, you can learn how simple it is to expand on Galaxy Watch ’s existing watch faces by creating a new one, tailored to your needs.
This tutorial is divided into two parts:
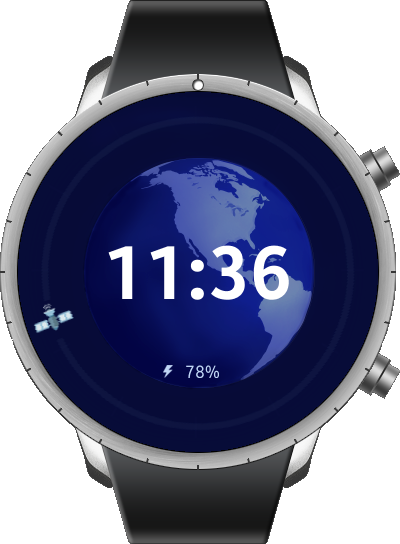
Presented solution is based on data provided by the Tizen Battery API .
You can download this application from Galaxy Store.
http://apps.samsung.com/gear/appDetail.as?appId=org.tizenschool.WatchFace
To build the Tizen application for the wearable, the environment should be downloaded and installed.
To test the application, following devices are required:
Open Visual Studio IDE to create a new Tizen Watchface App .

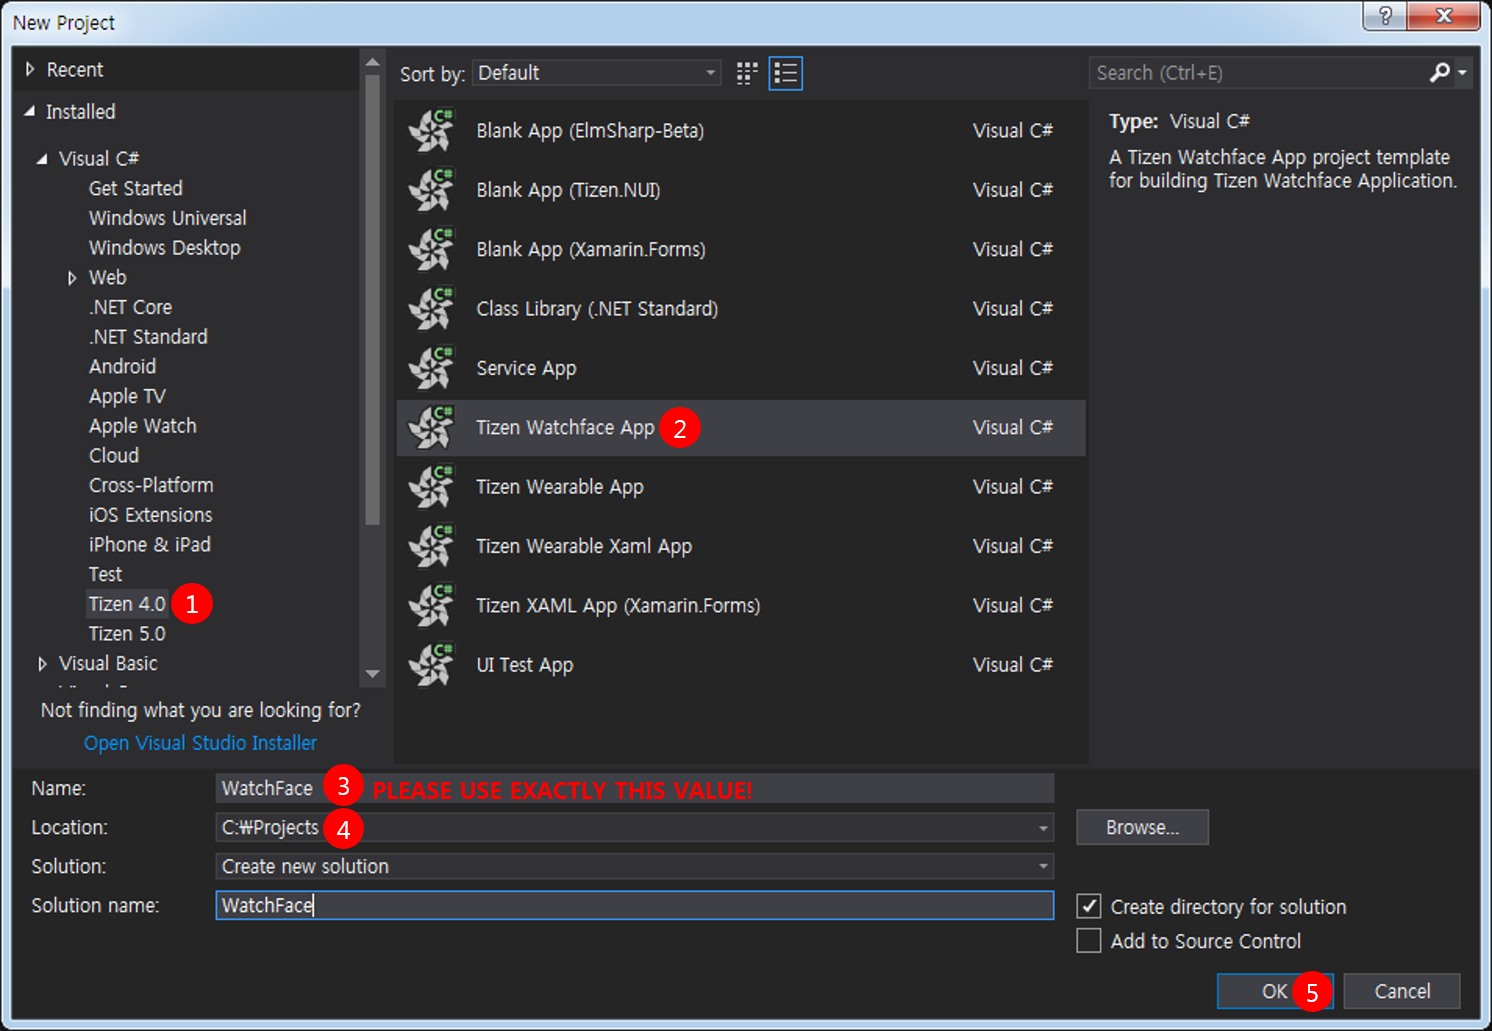
Step 1: Download and unpack the basic assets file.
The basic assets pack consists of two folders…

… which contain following set of images:

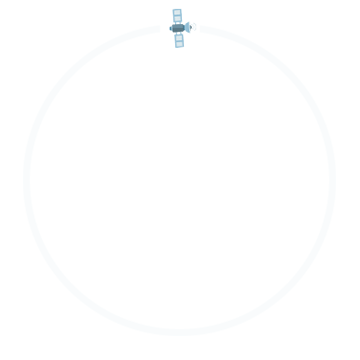
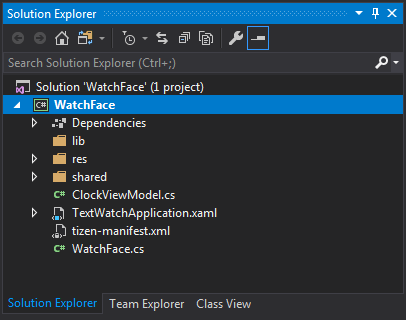
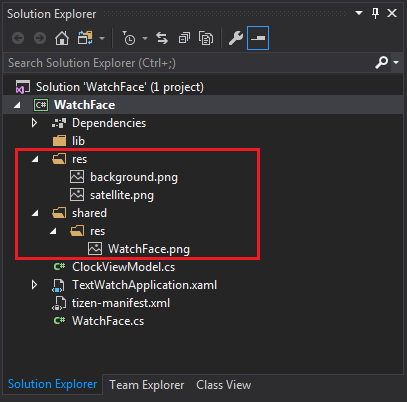
Step 2: Select the unpacked folders, that is res and shared , and copy them with context menu or press Control + C . Next, make a left mouse click on the project name WatchFace in Solution Explorer and press Control + V , to paste copied folders directly to the WatchFace project.
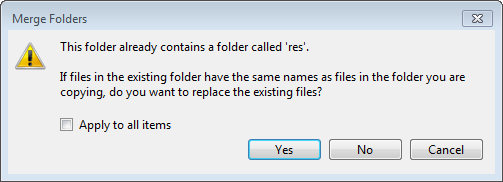
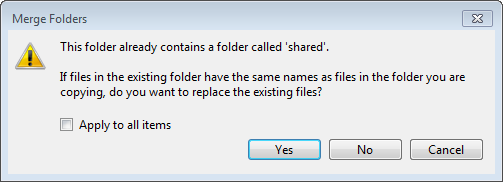
Step 3: Confirm following pop-ups to replace the content of the res and shared folders of the project.
Step 4: Make sure that there are required files copied into the project folders.
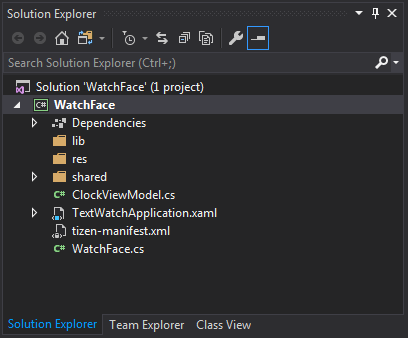
Step 1: Go to Solution Explorer window and open the TextWatchApplication.xaml file.
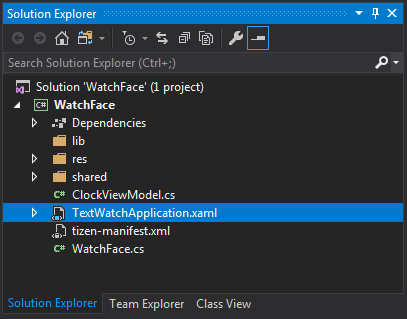
Step 2: Remove the StackLayout element, which has been prepared by default, and add an empty AbsoluteLayout element.
<?xml version="1.0" encoding="utf-8" ?>
<Application xmlns="http://xamarin.com/schemas/2014/forms"
             xmlns:x="http://schemas.microsoft.com/winfx/2009/xaml"
             x:Class="WatchFace.TextWatchApplication">
    <Application.MainPage>
        <ContentPage>
            <AbsoluteLayout>

            </AbsoluteLayout>
        </ContentPage>
    </Application.MainPage>
</Application>
Step 3: Add an Image as children of previously created AbsoluteLayout , it will be the background.
AbsoluteLayout.LayoutBounds is using bounds are set as a comma-separated list of values, X, Y, Width, and Height.
<?xml version="1.0" encoding="utf-8" ?>
<Application xmlns="http://xamarin.com/schemas/2014/forms"
             xmlns:x="http://schemas.microsoft.com/winfx/2009/xaml"
             x:Class="WatchFace.TextWatchApplication">
    <Application.MainPage>
        <ContentPage>
            <AbsoluteLayout>
                <Image AbsoluteLayout.LayoutBounds="0, 0, 360, 360"
                       Source="background.png" />
            </AbsoluteLayout>
        </ContentPage>
    </Application.MainPage>
</Application>
Notice that Source attribute was set to ” *background.png ”* and it’s a file that we have added to application resources in previous step.
Step 4: Add an Image displaying satellite, which will be rotated around the watchface to indicate current second.
<?xml version="1.0" encoding="utf-8" ?>
<Application xmlns="http://xamarin.com/schemas/2014/forms"
             xmlns:x="http://schemas.microsoft.com/winfx/2009/xaml"
             x:Class="WatchFace.TextWatchApplication">
    <Application.MainPage>
        <ContentPage>
            <AbsoluteLayout>
                <Image AbsoluteLayout.LayoutBounds="0, 0, 360, 360"
                       Source="background.png" />

                <Image AbsoluteLayout.LayoutBounds="0, 0, 360, 360"
                       Source="satellite.png"
                       Rotation="0" />
            </AbsoluteLayout>
        </ContentPage>
    </Application.MainPage>
</Application>
Step 5: Add a Label , which will display current time.
<?xml version="1.0" encoding="utf-8" ?>
<Application xmlns="http://xamarin.com/schemas/2014/forms"
             xmlns:x="http://schemas.microsoft.com/winfx/2009/xaml"
             x:Class="WatchFace.TextWatchApplication">
    <Application.MainPage>
        <ContentPage>
            <AbsoluteLayout>
                <Image AbsoluteLayout.LayoutBounds="0, 0, 360, 360"
                       Source="background.png" />

                <Image AbsoluteLayout.LayoutBounds="0, 0, 360, 360"
                       Source="satellite.png"
                       Rotation="0" />

                <Label AbsoluteLayout.LayoutBounds="0, 0, 360, 360"
                       HorizontalTextAlignment="Center"
                       VerticalTextAlignment="Center"
                       FontAttributes="Bold"
                       FontSize="24"
                       TextColor="#FFFFFF"
                       Text="00:00" />
            </AbsoluteLayout>
        </ContentPage>
    </Application.MainPage>
</Application>
To build and run this application on the device, follow the steps below:
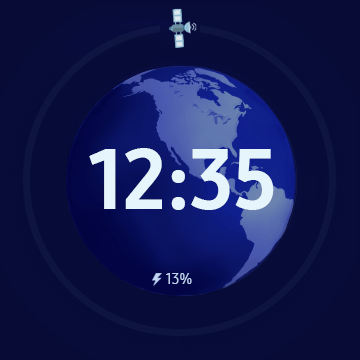
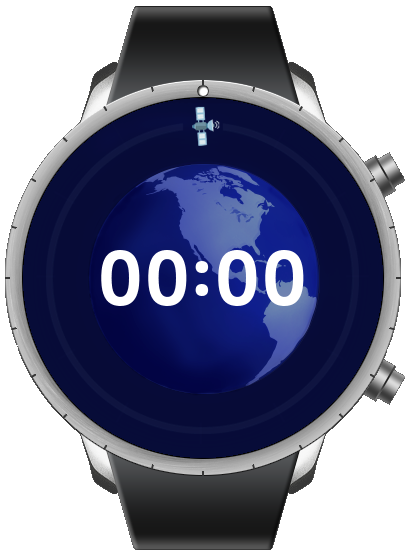
After these changes our application should look like this:
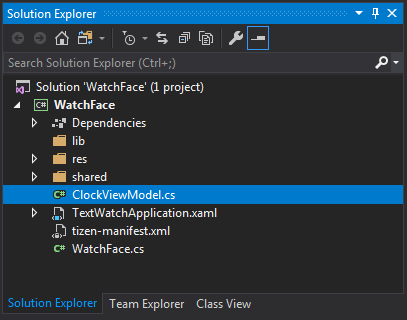
Step 1: Go to Solution Explorer window and open the ClockViewModel.cs file.
Step 2: Add SecondsRotation property, which will store rotation value in degrees, based on current second.
using System;
using System.ComponentModel;
using System.Runtime.CompilerServices;
using System.Collections.Generic;
using System.Linq;
using System.Text;

namespace WatchFace
{
    public class ClockViewModel : INotifyPropertyChanged
    {
        DateTime _time;

        public DateTime Time
        {
            get => _time;
            set
            {
                if (_time == value) return;
                _time = value;
                OnPropertyChanged();
            }
        }

        public int SecondsRotation { get; private set; }

        public event PropertyChangedEventHandler PropertyChanged;

        protected void OnPropertyChanged([CallerMemberName] string propertyName = "")
        {
            PropertyChanged?.Invoke(this, new PropertyChangedEventArgs(propertyName));
        }
    }
}
Step 3: Whenever the Time property setter is executed, calculate new value for SecondsRotation based on current second and notify the view about the change by calling OnPropertyChanged method with correct parameter.
public DateTime Time
{
    get => _time;
    set
    {
        if (_time == value) return;
        _time = value;
        OnPropertyChanged();

        SecondsRotation = _time.Second * 6;
        OnPropertyChanged(nameof(SecondsRotation));
    }
}
At this point, SecondsRotation has been calculated and the view has been informed. Next, we have to create a binding for that property, so the user interface can be updated. Let’s go to the next page.
Step 1: Go to Solution Explorer window and open the TextWatchApplication.xaml file.

Step 2: Add Bindings to the previously created properties in the view model.
<?xml version="1.0" encoding="utf-8" ?>
<Application xmlns="http://xamarin.com/schemas/2014/forms"
             xmlns:x="http://schemas.microsoft.com/winfx/2009/xaml"
             x:Class="WatchFace.TextWatchApplication">
    <Application.MainPage>
        <ContentPage>
            <AbsoluteLayout>
                <Image AbsoluteLayout.LayoutBounds="0, 0, 360, 360"
                       Source="background.png" />

                <Image AbsoluteLayout.LayoutBounds="0, 0, 360, 360"
                       Source="satellite.png"
                       Rotation="{Binding SecondsRotation}" />

                <Label AbsoluteLayout.LayoutBounds="0, 0, 360, 360"
                       HorizontalTextAlignment="Center"
                       VerticalTextAlignment="Center"
                       FontAttributes="Bold"
                       FontSize="24"
                       TextColor="#FFFFFF"
                       Text="{Binding Time, StringFormat='{}{0:HH:mm}'}" />
            </AbsoluteLayout>
        </ContentPage>
    </Application.MainPage>
</Application>
Notice that, we have created binding to the Time property, which is type of DateTime at the ClockViewModel.cs file. We used StringFormat to display the time in a required format.
Great !
We have just completed the implementation of the basic functionality of the watch.
Right now the application can be run on the target device or emulator.
To build and run this application on the device, follow the steps below:
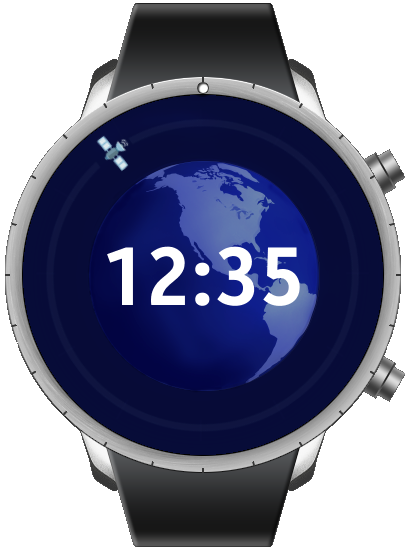
If you are using the target device, then launched application does not show the current time and the watch digits do not change.
This is not a mistake.
In order to allow the application to work, you should set it as a watch face.
Go to the next page to find out how to do it.
Step 1: Press the Back button (Upper button on the right side) to close the WatchFace application if it is launched.
Step 2: If necessary, use the Home button (Bottom button on the right side) to switch the device screen to the default watch face.
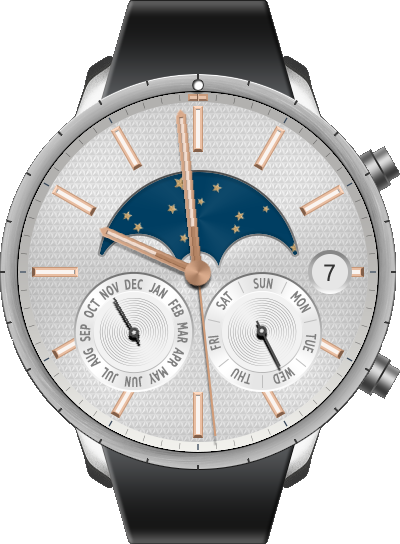
Step 3: Tap and hold the device screen, and then rotate the Bezel to find your watch face on the list of available watch faces.
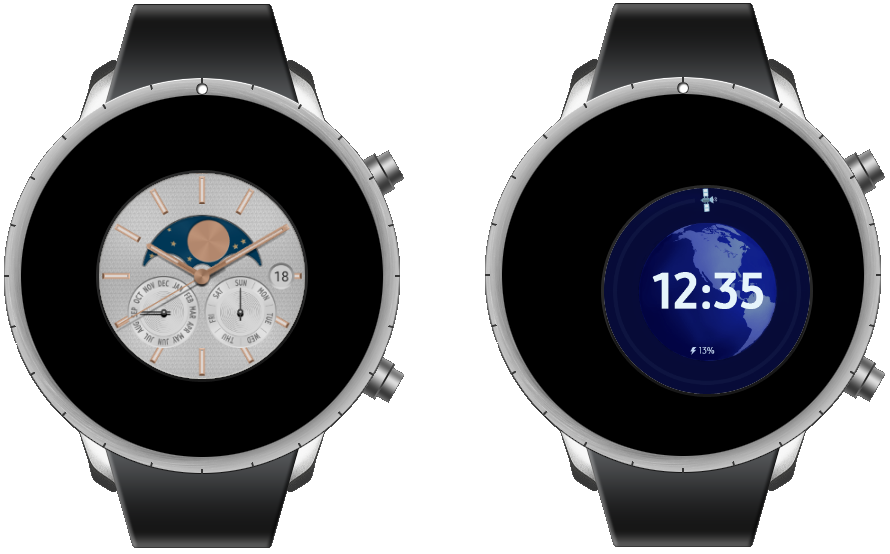
Step 4: Tap a desired watch face. The watch face you selected should be applied on the device screen.

The application sets as the watch face and shows the correct time.
Enjoy using your new watch face.
The next steps of this tutorial are optional.
But if you want to know how to display the battery information on the watch face, follow the rest steps.
Step 1: Download and unpack the extended assets file.
The extended assets pack consists of one folder…

… which contains one additional image:

Step 2: Select the unpacked folder, that is res , and copy them with context menu or press Control + C . Next, make a left mouse click on the project name WatchFace in Solution Explorer and press Control + V , to paste copied folders directly to the WatchFace project.

Step 3: Confirm following pop-up to replace the content of the res folder of the project.

Step 4: Make sure that there are required files copied into the project folders.
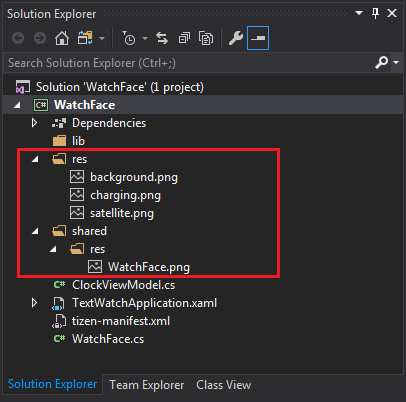
Step 1: Go to Solution Explorer window and open the TextWatchApplication.xaml file.

Step 2: Add a Label element responsible for displaying a percentage value of the battery level and an Image element responsible for displaying a charging indicator.
<?xml version="1.0" encoding="utf-8" ?>
<Application xmlns="http://xamarin.com/schemas/2014/forms"
             xmlns:x="http://schemas.microsoft.com/winfx/2009/xaml"
             x:Class="WatchFace.TextWatchApplication">
    <Application.MainPage>
        <ContentPage>
            <AbsoluteLayout>
                <Image AbsoluteLayout.LayoutBounds="0, 0, 360, 360"
                       Source="background.png" />

                <Image AbsoluteLayout.LayoutBounds="0, 0, 360, 360"
                       Source="satellite.png"
                       Rotation="{Binding SecondsRotation}" />

                <Label AbsoluteLayout.LayoutBounds="0, 0, 360, 360"
                       HorizontalTextAlignment="Center"
                       VerticalTextAlignment="Center"
                       FontAttributes="Bold"
                       FontSize="26"
                       TextColor="#FFFFFF"
                       Text="{Binding Time, StringFormat='{}{0:HH:mm}'}" />

                <Label AbsoluteLayout.LayoutBounds="150, 269, 60, 25"
                       HorizontalTextAlignment="Center"
                       VerticalTextAlignment="Center"
                       FontSize="6"
                       TextColor="#C0D5F4"
                       Text="50%" />

                <Image AbsoluteLayout.LayoutBounds="142, 275, 10, 13"
                       Source="charging.png"
                       IsVisible="True" />
            </AbsoluteLayout>
        </ContentPage>
    </Application.MainPage>
</Application>
At this point, you should have an watchface, which displays not only time and seconds’ indicator, but also charging icon and fixed battery level percent . On the next page we are going to read actual data from Tizen Battery API .
Step 1: Go to Solution Explorer window and open the ClockViewModel.cs file.

Step 2: Add two properties responsible for storing information about battery percentage level ( BatteryPercent ) and charging state ( IsCharging ).
using System;
using System.ComponentModel;
using System.Runtime.CompilerServices;
using System.Collections.Generic;
using System.Linq;
using System.Text;

namespace WatchFace
{
    public class ClockViewModel : INotifyPropertyChanged
    {
        DateTime _time;

        public DateTime Time
        {
            get => _time;
            set
            {
                if (_time == value) return;
                _time = value;
                OnPropertyChanged();

                SecondsRotation = _time.Second * 6;
                OnPropertyChanged(nameof(SecondsRotation));
            }
        }

        public int SecondsRotation { get; private set; }
        public bool IsCharging { get; private set; }
        public int BatteryPercent { get; private set; }

        public event PropertyChangedEventHandler PropertyChanged;

        protected void OnPropertyChanged([CallerMemberName] string propertyName = "")
        {
            PropertyChanged?.Invoke(this, new PropertyChangedEventArgs(propertyName));
        }
    }
}
Step 3: Add an using statement for Tizen.System to get access to the Tizen Battery API .
using System;
using System.ComponentModel;
using System.Runtime.CompilerServices;
using System.Collections.Generic;
using System.Linq;
using System.Text;

using Tizen.System;
Step 4: Create a class constructor and set initial values to created properties.
using System;
using System.ComponentModel;
using System.Runtime.CompilerServices;
using System.Collections.Generic;
using System.Linq;
using System.Text;

using Tizen.System;

namespace WatchFace
{
    public class ClockViewModel : INotifyPropertyChanged
    {
        DateTime _time;

        public DateTime Time
        {
            get => _time;
            set
            {
                if (_time == value) return;
                _time = value;
                OnPropertyChanged();

                SecondsRotation = _time.Second * 6;
                OnPropertyChanged(nameof(SecondsRotation));
            }
        }

        public int SecondsRotation { get; private set; }
        public bool IsCharging { get; private set; }
        public int BatteryPercent { get; private set; }

        public ClockViewModel()
        {
            IsCharging = Battery.IsCharging;
            BatteryPercent = Battery.Percent;
        }

        public event PropertyChangedEventHandler PropertyChanged;

        protected void OnPropertyChanged([CallerMemberName] string propertyName = "")
        {
            PropertyChanged?.Invoke(this, new PropertyChangedEventArgs(propertyName));
        }
    }
}
Step 5: Extend the class constructor by defining handlers of *ChargingStateChanged and* PercentChanged events.
public ClockViewModel()
{
    IsCharging = Battery.IsCharging;
    BatteryPercent = Battery.Percent;

    Battery.ChargingStateChanged += OnChargingStateChanged;
    Battery.PercentChanged += OnPercentChanged;
}
Step 6: Implement defined event handlers.
public ClockViewModel()
{
    IsCharging = Battery.IsCharging;
    BatteryPercent = Battery.Percent;

    Battery.ChargingStateChanged += OnChargingStateChanged;
    Battery.PercentChanged += OnPercentChanged;
}

private void OnPercentChanged(object sender, BatteryPercentChangedEventArgs e)
{
    BatteryPercent = e.Percent;
    OnPropertyChanged(nameof(BatteryPercent));
}

private void OnChargingStateChanged(object sender, BatteryChargingStateChangedEventArgs e)
{
    IsCharging = e.IsCharging;
    OnPropertyChanged(nameof(IsCharging));
}
So we already have all data needed to display battery properties on the watch face.
All that is left is to bind them to the user interface.
Step 1: Go to Solution Explorer window and open the TextWatchApplication.xaml file.

Step 2: Create bindings to previously created view model properties.
<?xml version="1.0" encoding="utf-8" ?>
<Application xmlns="http://xamarin.com/schemas/2014/forms"
             xmlns:x="http://schemas.microsoft.com/winfx/2009/xaml"
             x:Class="WatchFace.TextWatchApplication">
    <Application.MainPage>
        <ContentPage>
            <AbsoluteLayout>
                <Image AbsoluteLayout.LayoutBounds="0, 0, 360, 360"
                       Source="background.png" />

                <Image AbsoluteLayout.LayoutBounds="0, 0, 360, 360"
                       Source="satellite.png"
                       Rotation="{Binding SecondsRotation}" />

                <Label AbsoluteLayout.LayoutBounds="0, 0, 360, 360"
                       HorizontalTextAlignment="Center"
                       VerticalTextAlignment="Center"
                       FontAttributes="Bold"
                       FontSize="26"
                       TextColor="#FFFFFF"
                       Text="{Binding Time, StringFormat='{}{0:HH:mm}'}" />

                <Label AbsoluteLayout.LayoutBounds="150, 269, 60, 25"
                       HorizontalTextAlignment="Center"
                       VerticalTextAlignment="Center"
                       FontSize="6"
                       TextColor="#C0D5F4"
                       Text="{Binding BatteryPercent, StringFormat='{0}%'}" />

                <Image AbsoluteLayout.LayoutBounds="142, 275, 10, 13"
                       Source="charging.png"
                       IsVisible="{Binding IsCharging}" />
            </AbsoluteLayout>
        </ContentPage>
    </Application.MainPage>
</Application>
Great !
We have just completed the implementation of the extended functionality of the watch.
Right now the application can be run on the target device and set as the device watch face.
As you can see, the charging indicator is displayed only when the device is plugged in to the charger.
Additionally, the current value of the battery level is displayed on the screen.
To build and run this application on the device, follow the steps below:
